The iPhone 16 continues to push boundaries with its cutting-edge camera system, offering users the ability to capture professional-quality photos. However, getting the most out of this impressive camera requires more than just pointing and shooting. By mastering the right settings, you can elevate your photography game, whether you’re capturing breathtaking landscapes or detailed portraits. In this guide, we’ll explore the best camera settings on the iPhone 16 to help you create stunning, high-quality images.
iPhones have become renowned for their photographic prowess, and the iPhone 16 is no exception. With its upgraded features like advanced AI, improved low-light capabilities, and enhanced zoom, this smartphone is a powerhouse for photography. But even with these impressive upgrades, understanding how to optimize settings such as exposure, focus, and color balance will significantly impact your final results. By the end of this guide, you’ll be well-equipped with knowledge and tips to maximize the potential of your iPhone 16’s camera.
Whether you’re a seasoned photographer looking to fine-tune your skills or a beginner eager to explore mobile photography, this article offers valuable insights. These settings and tips are designed to make your photos pop, no matter the lighting conditions or subject. Let’s dive in to discover the optimal ways to capture picture-perfect moments with your iPhone 16.
Maximizing iPhone 16 Camera Performance: Essential Settings
The iPhone 16 camera system is packed with features designed to make your photos shine. But to truly unlock its potential, you need to understand how to adjust specific settings. Here, we’ll break down the best settings for various scenarios, helping you achieve the most professional-looking results possible.
Adjusting Focus and Exposure for Crisp, Balanced Photos
The ability to manually control focus and exposure is crucial for achieving clear, well-balanced images.
Using Auto Focus and Tap-to-Focus
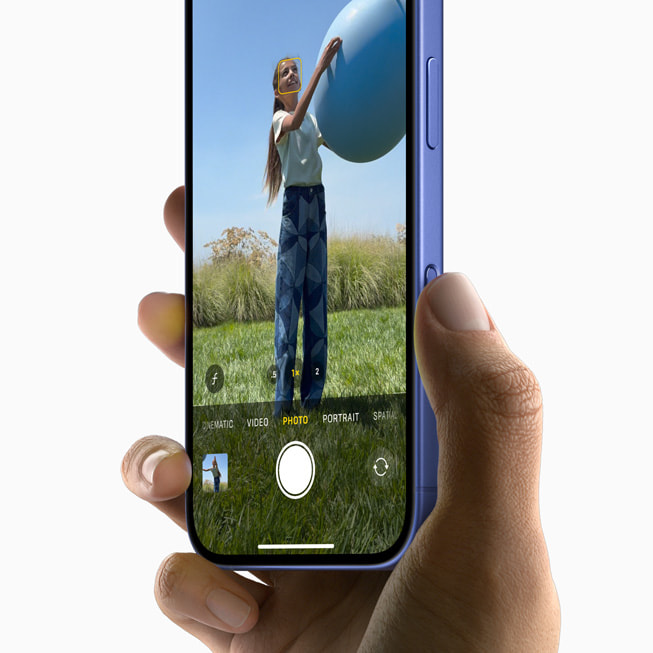
One of the simplest but most effective settings on the iPhone 16 is its auto-focus feature. While this automatic setting works for most shots, there are times when manually adjusting focus can dramatically improve photo quality. By tapping on the area you want to focus on, you give the camera precise instructions, ensuring that the subject of your photo stands out in sharp detail. For instance, when shooting a portrait, tapping on the subject’s face will ensure that it’s in sharp focus while softening the background for a more professional look.
Adjusting Exposure Manually
Exposure is just as important as focus. Too much light can wash out your photo, while too little light will obscure details. After setting your focus, swipe up or down on the screen to manually adjust the exposure level. Lowering the exposure helps when shooting in bright conditions like direct sunlight, while increasing it is useful for darker environments. Experimenting with manual exposure gives you more control, helping you capture the perfect balance of light and detail.
Portrait Mode: Crafting Depth and Dimension
Portrait mode is one of the iPhone 16’s standout features, allowing users to create professional-looking depth effects that mimic DSLR cameras.
Utilizing Lighting Options for Studio-Quality Shots
Within Portrait mode, the iPhone 16 offers several lighting options that can drastically alter the mood and quality of your photo. Options like Natural Light, Studio Light, and Contour Light give you flexibility in how your subject appears. For an editorial-style portrait, Studio Light brightens the face while adding soft shadows, creating a polished look. Experiment with these settings to see which lighting scenario best matches the tone you’re aiming to create.
Controlling Background Blur (Bokeh)
Portrait mode also offers the ability to adjust background blur, or “bokeh.” This effect is ideal for highlighting your subject while keeping the background soft and unobtrusive. You can adjust the amount of background blur both before and after taking the photo by tapping the ‘f’ icon and sliding the aperture control. A lower aperture number results in more blur, creating a dramatic focus on your subject.
Low-Light Mastery: Night Mode and ProRAW
Taking photos in low light used to be a challenge for smartphones, but the iPhone 16 excels with its enhanced Night Mode and ProRAW capabilities.
Optimizing Night Mode for Sharp Low-Light Shots
When shooting in low-light conditions, Night Mode on the iPhone 16 automatically activates. The camera detects the lighting and increases exposure time, allowing more light into the sensor for a clearer image. For best results, keep your hand steady or use a tripod to avoid blur. If you need more light, adjusting the exposure by sliding the Night Mode timer can make a significant difference. Just be cautious not to overexpose, as this can lead to unwanted noise in your image.
Shooting in ProRAW for Detailed Edits
ProRAW is another feature that allows for more detailed edits in low-light scenarios. This format captures uncompressed image data, giving you greater flexibility in post-processing. With ProRAW, you can fine-tune details like shadow, exposure, and color balance without losing image quality. Use this setting when you plan to edit your photos afterward, as it provides much more room for adjustments than the standard JPEG format.
HDR and Smart HDR: Capturing Stunning Landscapes
The iPhone 16’s Smart HDR (High Dynamic Range) feature is perfect for landscapes, ensuring a balanced exposure even when the lighting varies across the scene.
Smart HDR for Balanced Lighting
When photographing landscapes or scenes with contrasting light sources, Smart HDR is your best friend. It merges multiple exposures into one shot, combining the best elements of each to create a balanced, vibrant image. This setting is especially useful when shooting sunrises, sunsets, or scenes with dramatic lighting, as it ensures that both the bright and dark areas are properly exposed.
Optimizing Color and Contrast in Landscapes
The iPhone 16’s Smart HDR also enhances color accuracy and contrast. Whether capturing a lush green field or a dynamic cityscape, Smart HDR ensures that colors remain vivid and true to life. In the settings menu, ensure that Smart HDR is toggled on to fully benefit from this feature in your outdoor shots.
Action Shots: Freezing Motion with Burst Mode and Faster Shutter Speeds
Capturing fast-moving subjects can be challenging, but the iPhone 16 offers tools that make action photography easier.
Utilizing Burst Mode for Rapid Sequences
When photographing action scenes, such as sports or wildlife, Burst Mode is incredibly useful. This feature captures a series of shots in quick succession, ensuring that you don’t miss the perfect moment. To activate Burst Mode, simply swipe left on the shutter button and hold. The iPhone will take a rapid sequence of photos, allowing you to select the best one afterward.
Adjusting Shutter Speed for Clarity
For motion shots, controlling the shutter speed is key. While the iPhone 16 doesn’t allow direct manual control over shutter speed in the native camera app, third-party apps like Halide can unlock this feature. A faster shutter speed will freeze movement, ensuring sharp images, while a slower shutter speed can create artistic motion blur. Experiment with these settings to capture dynamic, action-filled scenes.
Conclusion: Elevating Your iPhone 16 Photography
Mastering the camera settings on your iPhone 16 can significantly elevate the quality of your photos. By controlling focus, exposure, and utilizing features like Portrait Mode, Night Mode, and Smart HDR, you unlock the full potential of your smartphone’s camera. Whether you’re shooting portraits, landscapes, or action shots, these tips will help you capture stunning images every time.
The iPhone 16 is a powerful tool for both amateur and professional photographers. With practice and experimentation, you’ll quickly discover how to make your photos stand out, turning ordinary moments into extraordinary ones.


